
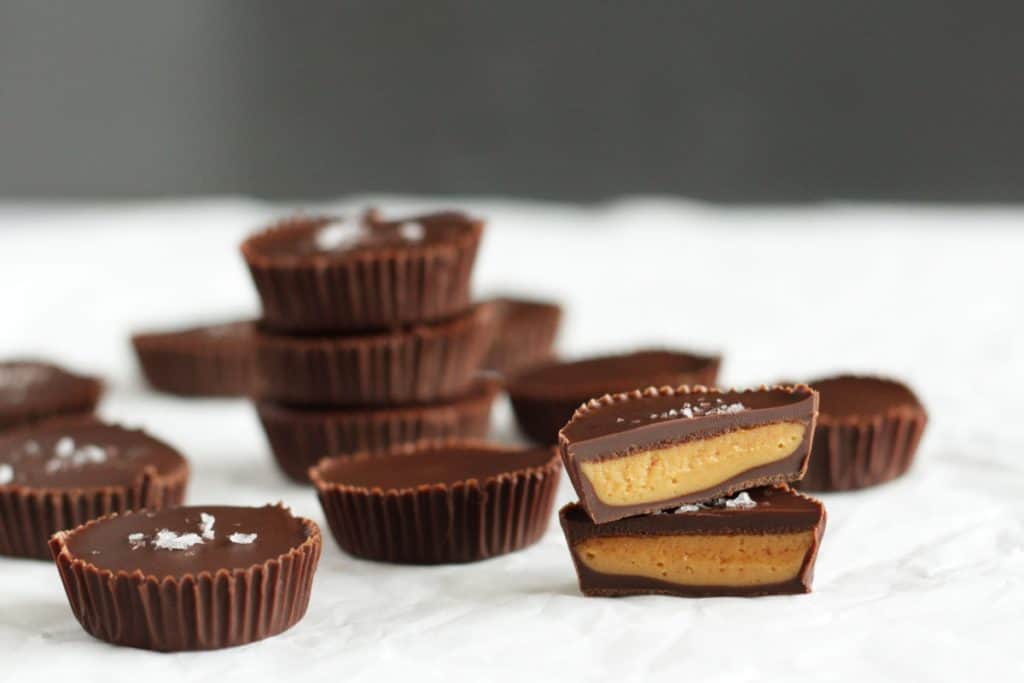
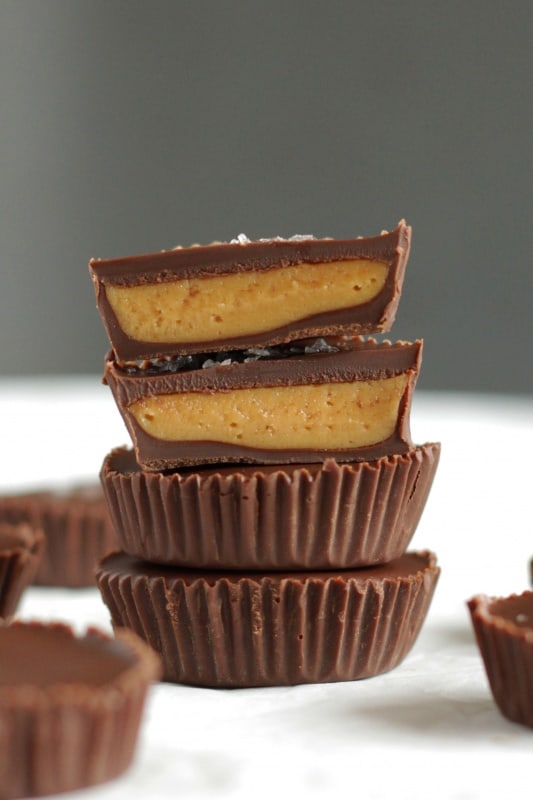
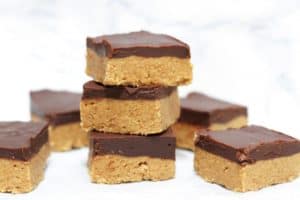
Homemade Peanut Butter Cups are no-bake, simple and quick to make and taste so much better than store-bought! Made with just 4 basic ingredients, they’re healthier too, vegan and gluten-free.
Up until several years ago, Reese’s were the gold standard in Peanut Butter Cups and they were definitely my favorite candy overall. They are starting to become widely available and are gaining in popularity here in Austria too. My favorite is the Big Cup, with the extra-thick layer of peanut butter filling.
I posted my recipe for Peanut Butter Bars a few years ago, which are also no-bake, and which have a peanut butter layer that is similar in texture and flavor to Reese’s. My Austrian friends love making my Peanut Butter Bars!
Because of my love of Peanut Butter Cups, I have become obsessed with Ben & Jerry’s Peanut Butter Cup Ice Cream. The best part is of course the Peanut Butter Cups – they are amazing! We also tried Justin’s Peanut Butter Cups when we were in the U.S. and love those too!
This got me to thinking that homemade Peanut Butter Cups would be way better than store-bought ones – and they most definitely are! The better quality chocolate and peanut butter you use, the better your Peanut Butter Cups will be. You choose the ingredients that are right for you, whether healthy, vegan or gluten-free, or you could make them without the sweetener if you wish. It’s all up to you.
I always assumed making homemade Peanut Butter Cups was complicated but they are actually really quick and easy and super fun to make (and eat)!
The first time I made Peanut Butter Cups, I used with regular baking chocolate and found the chocolate too sweet for my taste. The chocolate was also somewhat temperamental and needed to be reheated often when it got too thick.
After that, I bought some dark chocolate coating, which, according to the label, contains a lot less sugar than the baking chocolate. Chocolate coating meant to be melted and is therefore a dream to work with! It flows smoothly and stays liquid throughout the entire process. Dark chocolate coating has just the right amount of sweetness. It’s not like the super-dark chocolate that can taste too strong, it’s just great chocolate flavor that isn’t too sweet.
I even got a little fancy and sprinkled some sea salt flakes on top of a few of the Peanut Butter Cups to bring out the chocolate flavor and I love it! I would add less flakes next time, so there’s a tiny pop of saltiness. The sea salt is not everyone’s cup of tea so you might want to try it on just a few like I did.
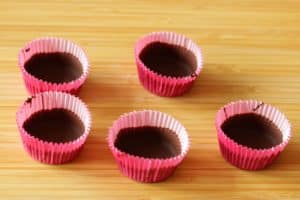
Swirl the melted chocolate around the inside of the mini-muffin case so that it goes about a centimeter up the sides as well. Put the cups in the freezer to set while you get your peanut butter filling ready.
Fill the chocolate cups with melted peanut butter and honey filling and put them back in the freezer for 5-10 minutes.

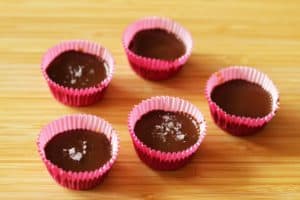
Finally, spoon some melted chocolate over the tops and add a few flakes of sea salt if you wish. Put the Peanut Butter Cups back in the freezer for about 10-15 minutes to set the chocolate, then transfer them to the refrigerator to chill for about 1 hour.
Homemade Peanut Butter Cups are best eaten straight from the fridge and they can also be frozen.

Homemade Peanut Butter Cups
Ingredients
Peanut Butter Cups
- 7 ounces (200 g) dark chocolate coating or baking chocolate*
- 1 teaspoon vegetable oil
- ½ cup (125 g) peanut butter creamy or crunchy
- 1 tablespoon honey or maple syrup to taste
- Sea salt flakes optional, for the tops
You will also need
- 20 paper mini-muffin baking cases
Instructions
- Break or chop the chocolate coating into chunks and put it in a microwave-safe bowl, along with the oil.* Heat the chocolate at 50% power for one minute, stir, then heat it in 30-second intervals, stirring in between, until the chocolate is completely smooth.
- It’s best to work in batches, working on about half the peanut butter cups at a time while the other half chills in the freezer. Holding the mini-muffin case in your hand, spoon one teaspoon of the melted chocolate into it and swirl the chocolate around the inside edge of the mini muffin case so that the chocolate runs about 1 cm up the sides. Put the chocolate cups into the freezer to set for 5-10 minutes while you get your peanut butter filling ready.
- Melt the peanut butter in a microwave-safe bowl in the microwave at 50% power for about 20 seconds, or until melted. Stir in honey or maple syrup to taste. Fill the chilled chocolate cups with about ¾ teaspoon of the peanut butter filling and jiggle the cups or use the back of a spoon to smooth the filling to the sides. Return the cups to the freezer for 5-10 minutes.
- If the melted chocolate has thickened, reheat it in the microwave for 10 seconds and stir. Spoon one teaspoon of melted chocolate over the peanut butter filling, swirling or spreading the chocolate to the edges. Sprinkle with a few flakes of sea salt if desired. Put the Peanut Butter Cups back in the freezer for about 10-15 minutes to set the chocolate, then transfer them to the refrigerator to chill for about one hour, or until completely set.
- Store Peanut Butter Cups tightly covered in the refrigerator for up to one week or in the freezer for up to one month.
Leave a Reply